What
The DigiStump DigiSpark is an excellent microcontroller development board. The price of only 1-2 Euro is so low you can drop it in your designs and leave it there. This even beats the price of soldering your own AVR Board which would require connecting a programmer, a UART for debugging and a some sort of power circuitry. The DigiStump has all of this integrated at the size of a postage stamp.
This Guide will show you how to setup the Arduino IDE, configure it for use with the DigiSpark Board, set up the drivers, connect it and compile and program the „Echo“ Example, which enables sending data to and from the DigiSpark via USB using either Python or C++.
The result is a very useful environment for programming micro-controllers. A single USB cable is used for powering the DigiSpark, programming it and debugging it by enabling commands to be sent to and from the DigiSpark via the computer. No programming adapter and no UART setup is required. All the pins remain free for other purposes. The USB cable can later be swapped for a USB battery pack or phone charger for in-circuit use.
When
I’ve had a few DigiStump board lying around for a while, but I never got around to using them for anything good. I’ve also avoided Arduinos, because I want to write my own code and build my own custom boards. They are also too expensive for me to add to projects and forget. One day I put a DigiSpark to the test for a bathroom scale project. I had found code for the talking to the sensor chip in the scale and it had multiple dependencies on Arduino libraries.
Why
The prospect is to have a small and simple microcontroller board which can be conviniently programmed and debugged without connecting a whole harness of cables to it. I have a number of small projects such as sensors I need to interface the computer with or sensors I want to translate to I2C, so larger microcontrollers can access them.
Background
I came across these boards when I had a look at a bootloader for an Atmega8, the TinyUSBBoard. It allows the Atmega8 to be programmed via USB without connecting an external Programmer. Some tricks also allow it to communicate to the PC via USB HID messages, but this is somewhat difficult to set up. In my experience the Board is rather instable and requires a lot of soldering.
The DigiStump also uses the micronucleus bootloader, but as a commercial product, it is far better supported. The Board nearly works out of the box.
How
1. Download and install Arduino IDE
Download and run „arduino-1.6.8-windows.exe“ from https://www.arduino.cc/en/Main/Software.
2. Configure IDE for DigiSpark
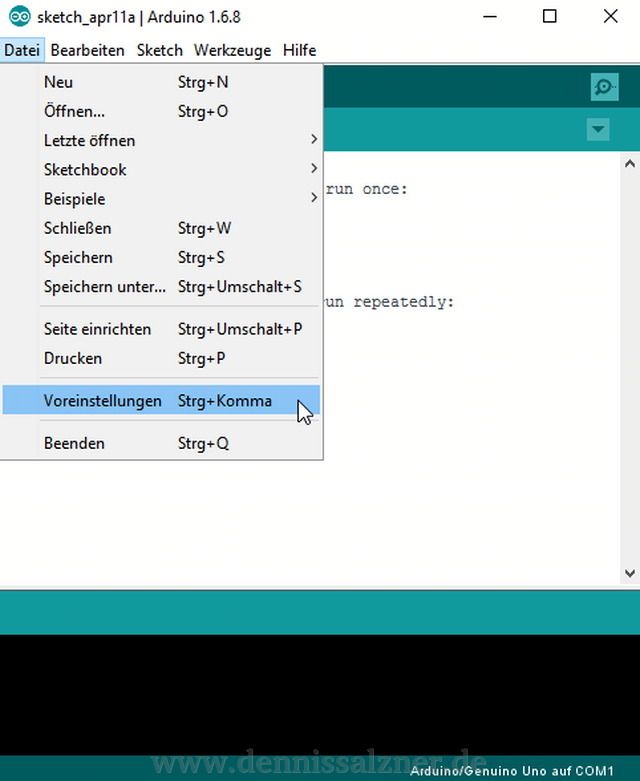
In the „File“ menu, select „Preferences“.
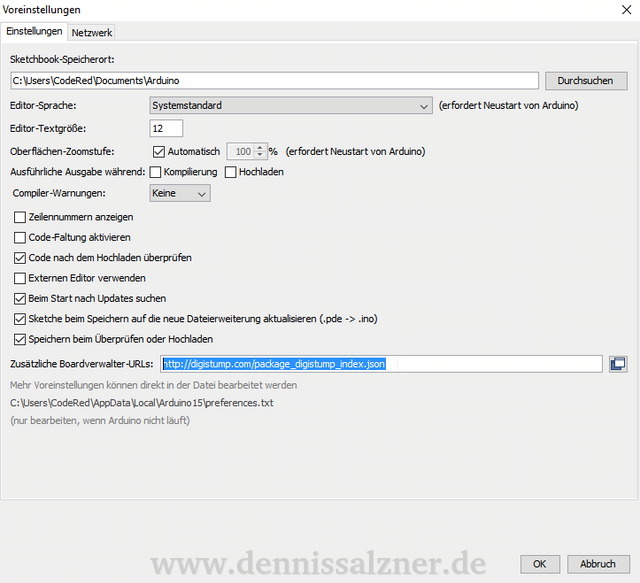
In the box labeled “Additional Boards Manager URLs” enter: http://digistump.com/package_digistump_index.json
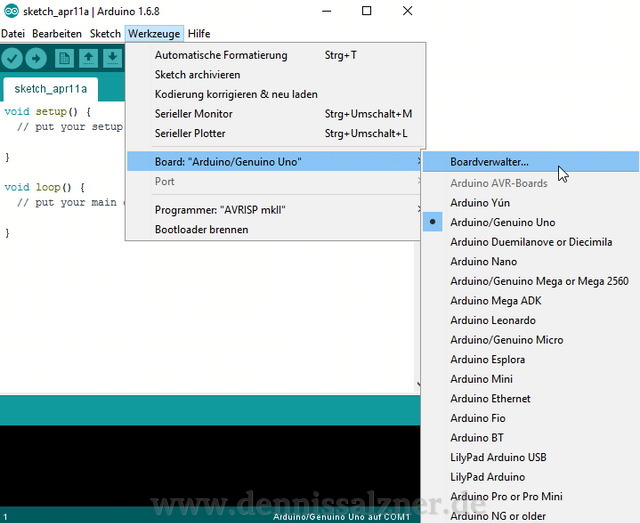
Then, in the „Tools“ menu go to the „Board“ submenu and select „Board Manager“. Select „Contributed“ in the „Type“ drop-down menu. Then select the „Digistump AVR Boards“ package and click on „Install“.
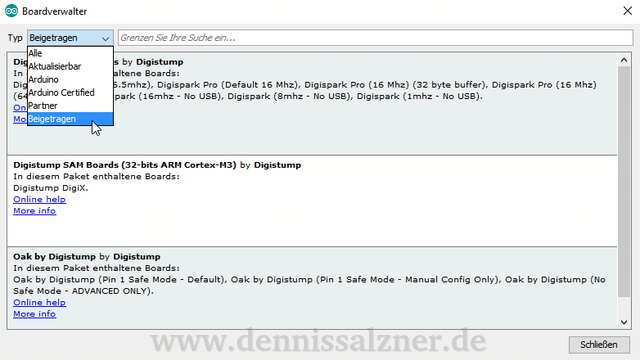
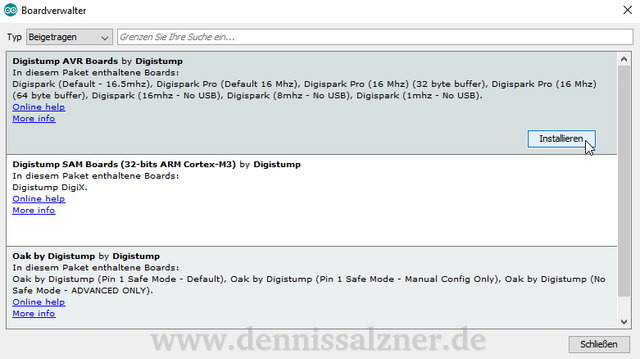
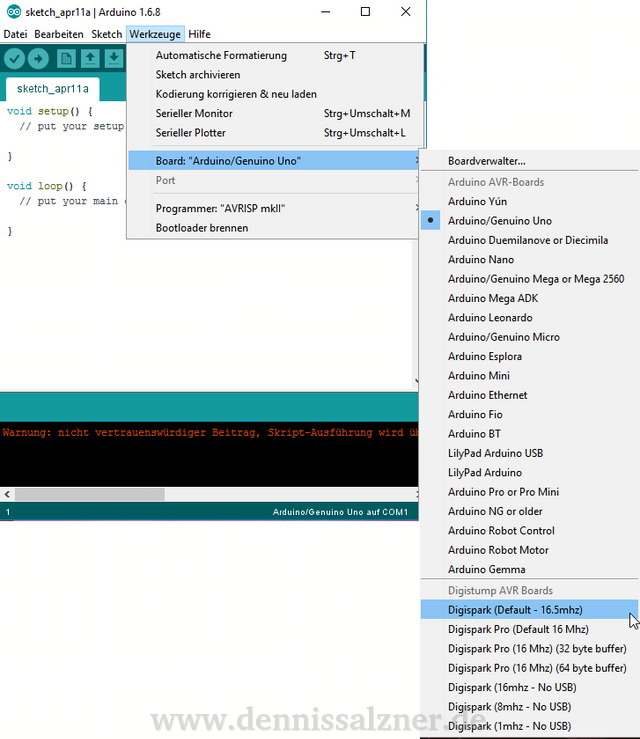
After completion „Digispark (Default – 16.5mhz)“ will be available in the „Boards“ submenu under „Tools“.
(see also here)
3. Driver installation
The DigiStump connects to the computer via USB and needs drivers. Download them from https://github.com/digistump/DigistumpArduino/releases/download/1.6.7/DigistumpDrivers.zip
(see also here)
4. Connect
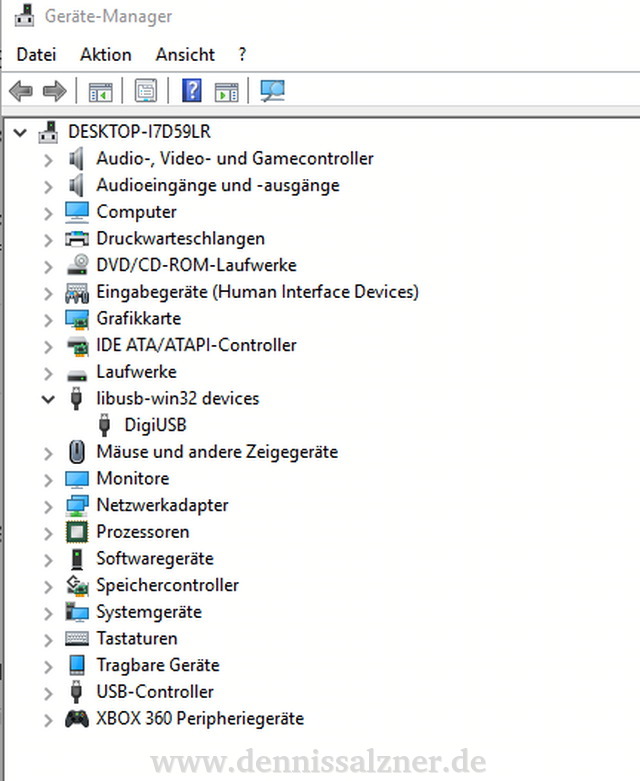
Connect the DigiSpark to the USB port.
Note: It should show up as „DigiUSB“ under „libusb-win32-devices“ in the Windows Device Manager. If it appears as an „unknown device“, something with the driver installation went wrong.
5. Upload a program for testing
The demo program we will be uploading is called „Echo“. It utilizes the USB HID interface to send messages back and forth between the DigiSpark and the computer. This is very useful for debugging and controlling software as this enables – albeit slow – bidirectional communication via the same USB cable the DigiSpark is programmed by without additional hardware.
In the „File“ menu under „Examples“ open „DigiSparkUSB“ and select „Echo“.
After the program/sketch opens, click on „Upload“ in the „Sketch“ menu.
In order to programm the DigiSpark it has to be disconnected and reconnected to the USB port. The Arduino IDE waits for this to happen.
6. Run receiver-software
On the computer we need to run special software to receive the USB HID messages from the DigiSpark.
There are three different versions available. A version written in Ruby which I found to work under Linux, but not under Windows. It is a bit of a hassle to install, if you need to install Ruby first. The C++ version needs to be compiled. Then there is a Python version, which I use, because I write most of my software in Python. It also pre-compiled and runs out of the box.
Download the master zip-File from https://github.com/digistump/DigisparkExamplePrograms.git . (This is an approx. 110 MB file).
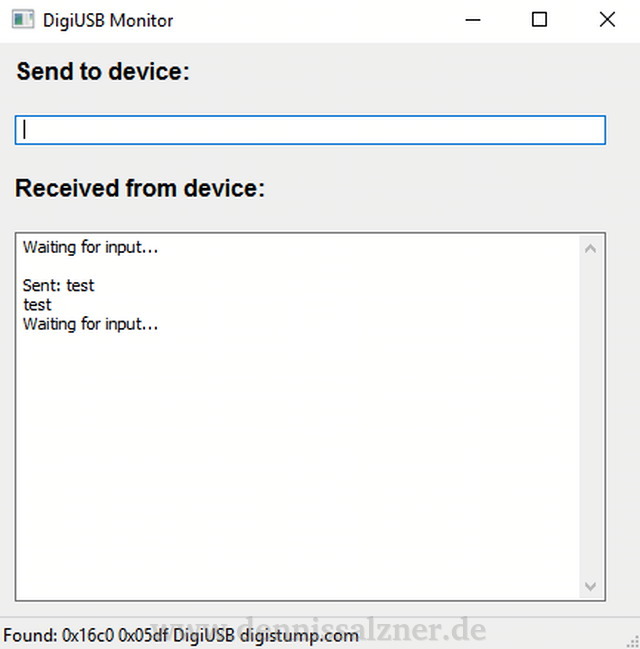
Extract and run „monitor.exe“ from „DigisparkExamplePrograms-master\DigisparkExamplePrograms-master\Python\DigiUSB\windows“
It should now be possible to send and receive messages from the DigiSpark.
Progress
The DigiSpark is now set up and ready for use. Programming it can be achieved without connecting additional hardware. Sending debug messages to the computer is possible via the USB HID connection. This yields a very versatile platform, which will be very useful in future projects.