What
I’ve been growing herbs on my balcony in the summer. The heat causes the water to vaporate quickly meaning I have to water the growing beds every day. If I’d forget or when I’m on a business trip, the herbs would dry up. So the only solution is an automatic Watering System for my balcony.
When
The thought came up some time ago. In the end it was roughly a three hour build.
Background
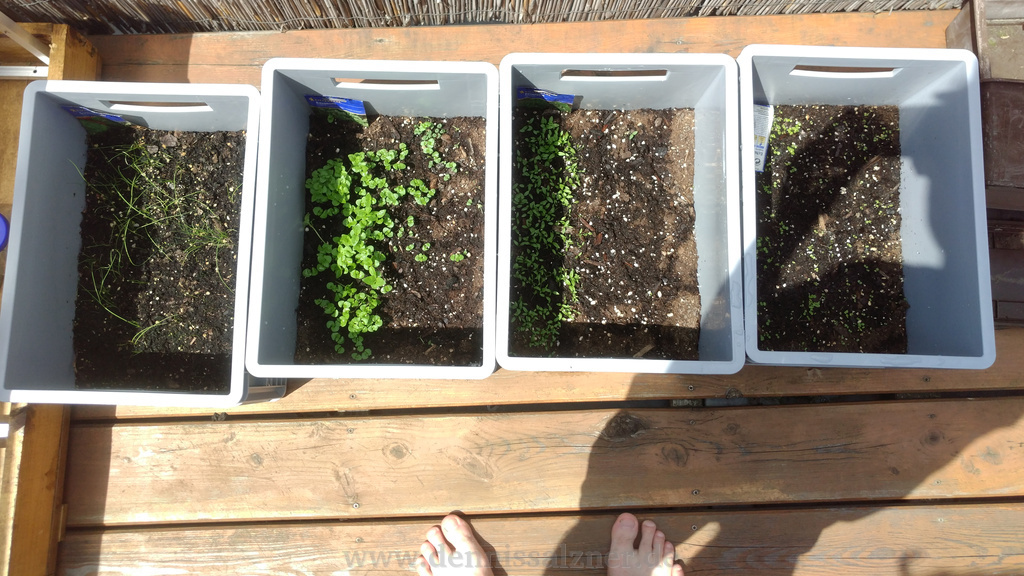
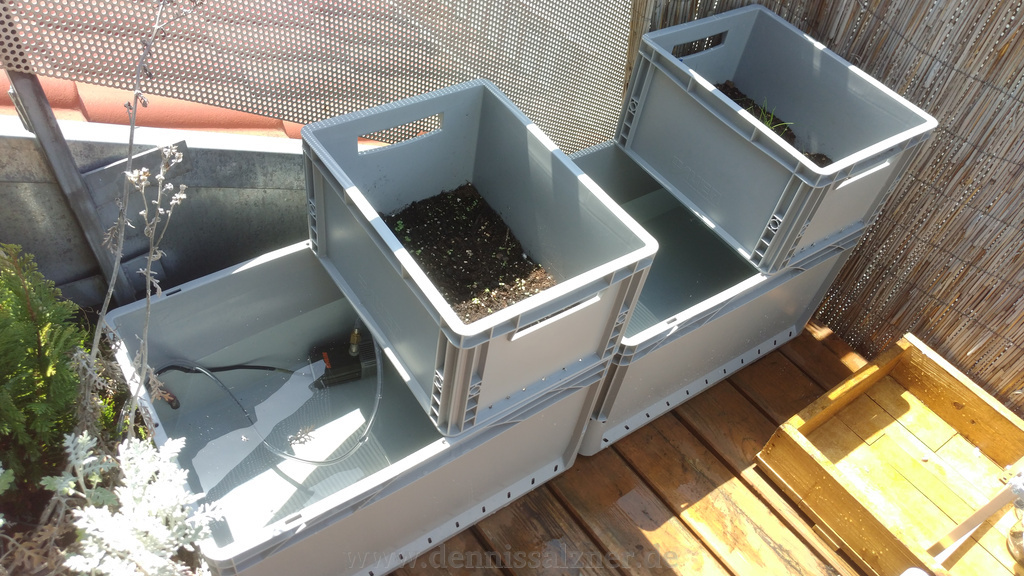
I grow herbs in standard size Eurobox Containers that were previously used for tools in my workshop. They aren’t aesthetically pleasing, but they can handle harsh temperatures and it’s easy to drill holes into them to remove excess water. The depth is useful to keep the wind from hurting the plants. The boxes are stackable.
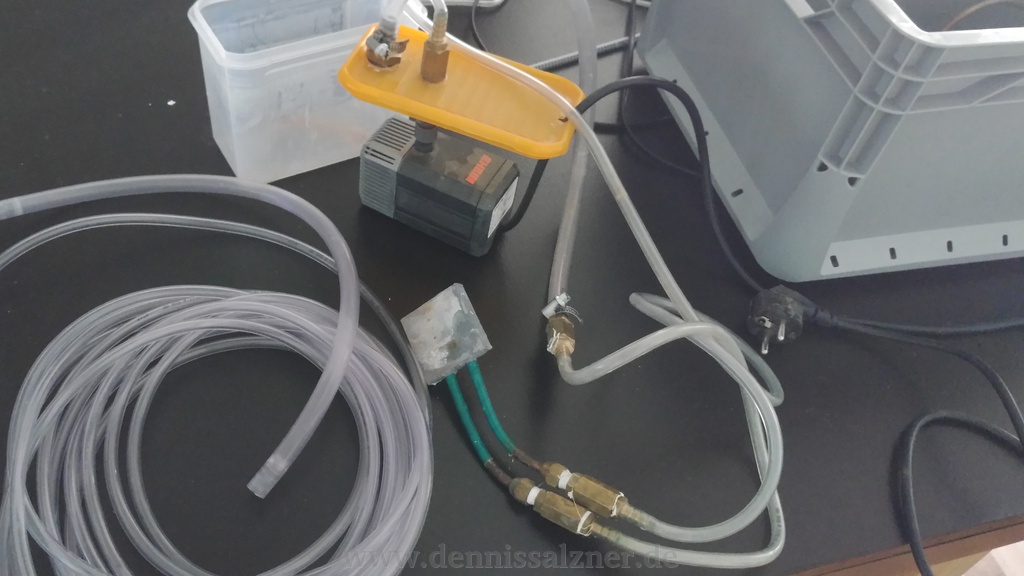
The idea is to use the pump and tubing from a previous watercooled PC project. I’ll be using large Eurobox containers to hold a lot of water. The smaller growing beds will be placed on top of the large containers. I’ll be drilling holes in the bottom of the growing beds, so that excess water can drip into the larger containers. A pump and tubing will move water from the large containers in the bottom into the growing beds.
How
Step 1: Connect the water containers
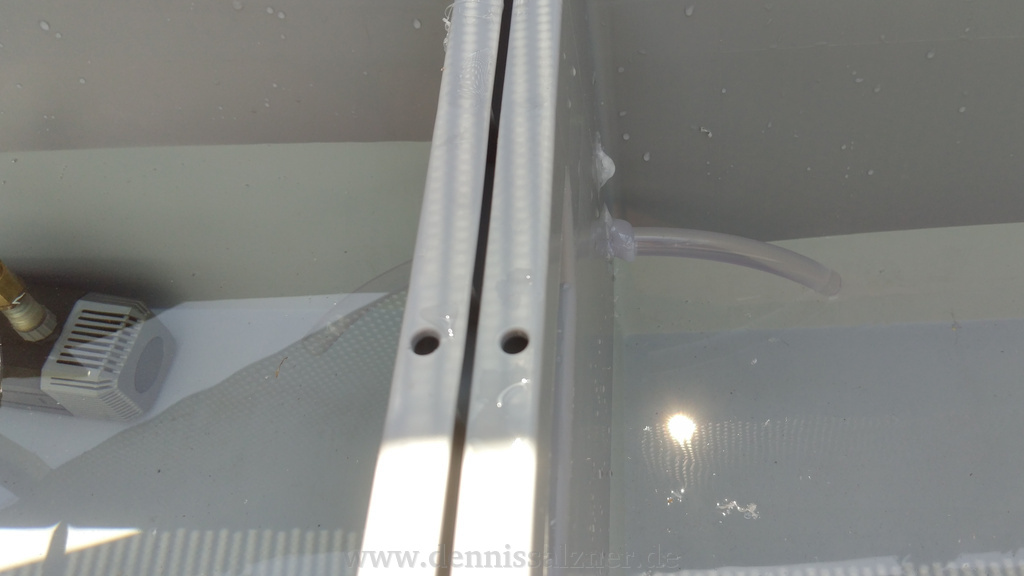
I placed two large containers side by side and drilled two holes. One for the tubing and wiring to the pump and one to connect the two containers. A tube connects to the rainwater gutter on the roof, so that rainwater will help fill the containers.
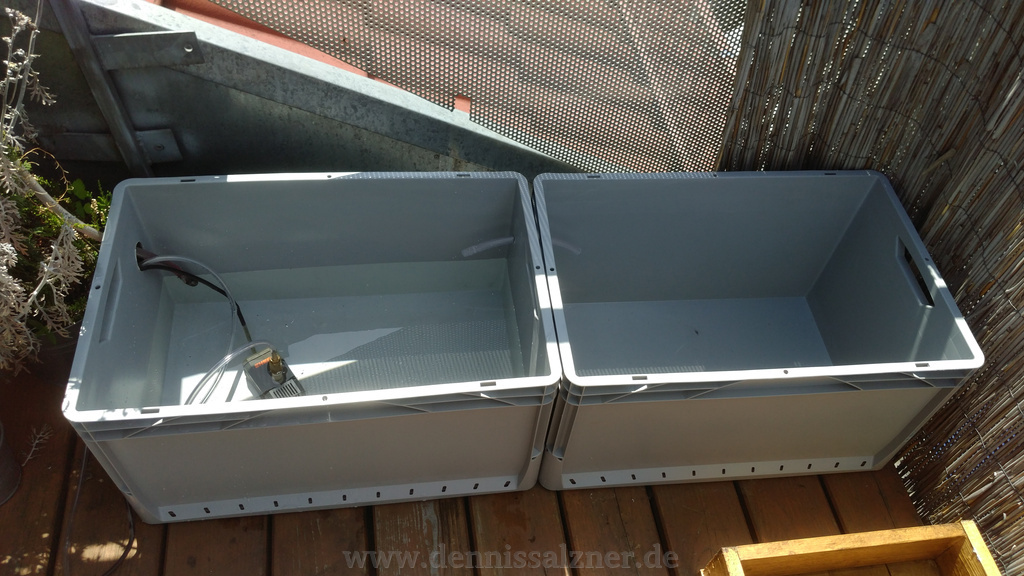
An additional short tube connects the two containers. This makes sure that excess water from one container can move to the other. The fill levels in the containers will even out after the water level reaches a height above the connecting tube. Later the pump will additionally move water from the left to the right container, because its intake will be in the left container and the output will be in the right container. The connecting tube was sealed off with hot glue.
Step 2: Drill holes in the bottom of the growing beds and place them on the water containers
The second step was to drill holes in the bottom of the growing beds. This way excess water can drip down into the water containers.
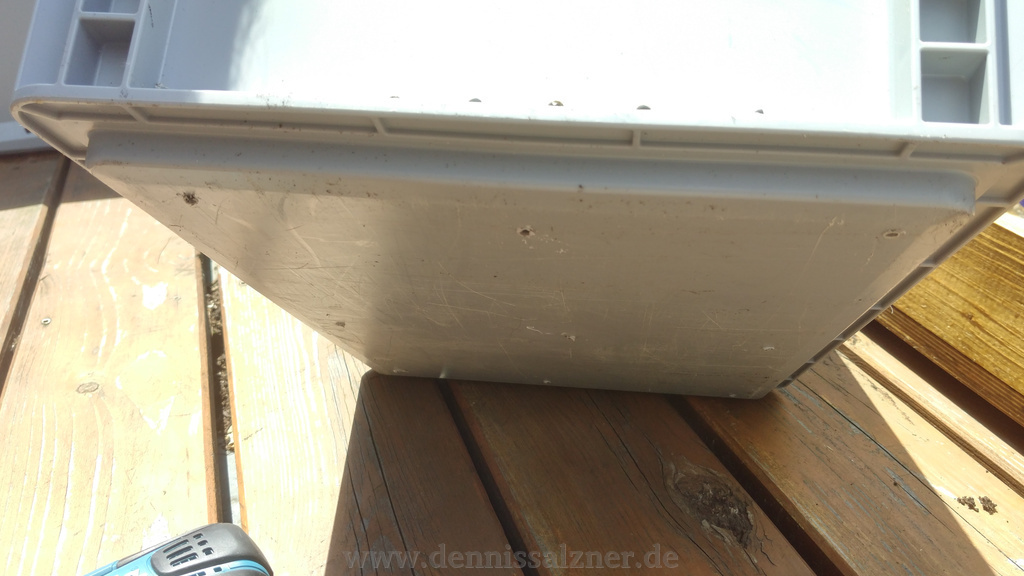
The growing beds were then placed on top of the water containers.
Step 3: Add the tubing
Tubing was added arround the rims of the growing beds. I’ve fastended them to the handles of the boxes using zip ties.
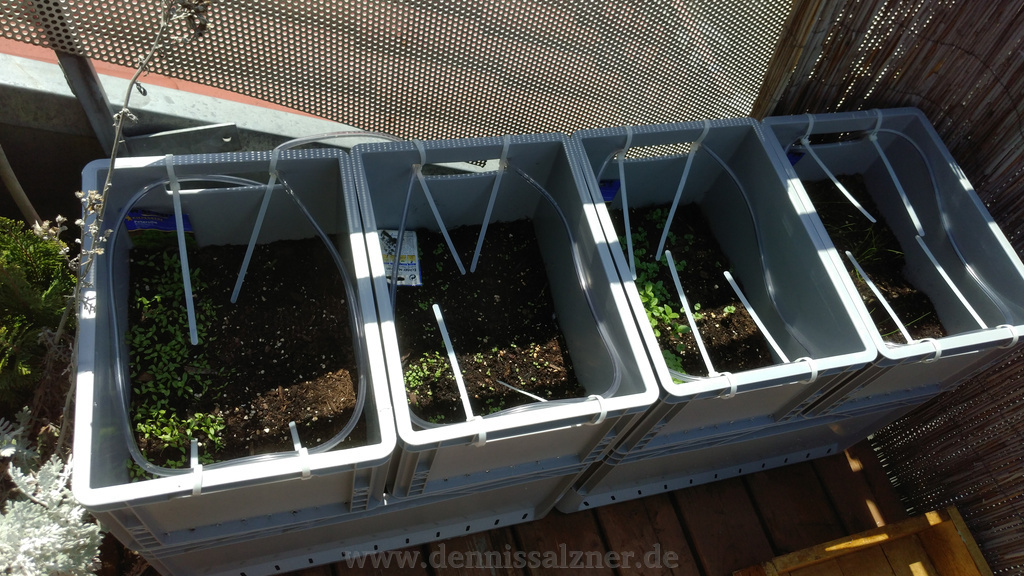
I also had to seal off the holes I had previously drilled into the growing beds, because otherwise water would drip out of the sides rather than down into the water containers. Hot glue was the solution to this.
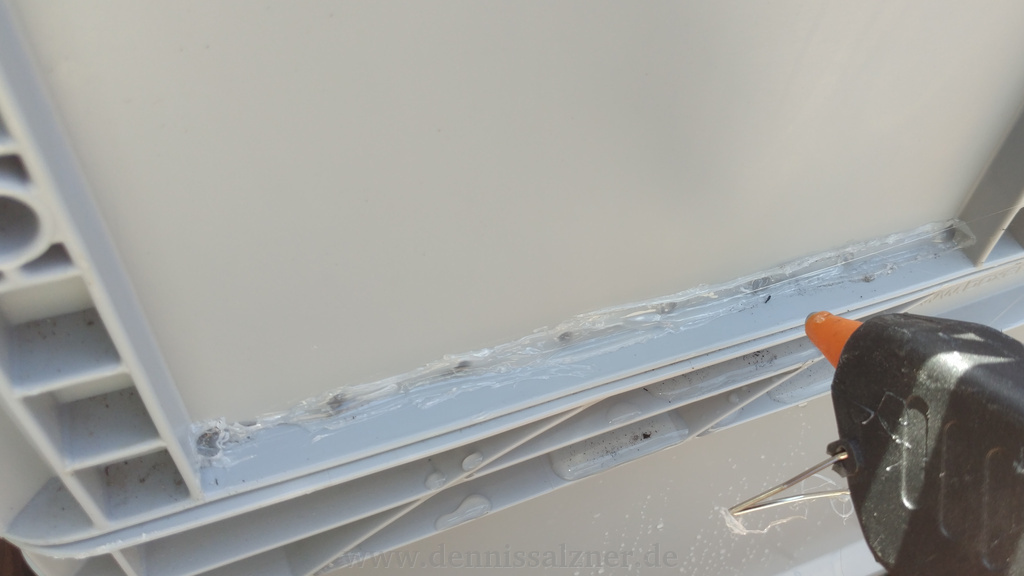
After that I used a small drill bit to puncture the tubing. This required some experimentation as the water pressure in the tubing is higher near the pump and lower towards the end of the tubing. Hot glue is also excellent at sealing tubing.

Progress
This project was finished in about three hours. The pump is now connected to a time switch. It is left to be seen how well this will work in the long run. I suspect I will be running into problems with algae very soon. Perhaps I will have to replace the clear tubing with black tubing to block the sunlight and prohibit things from growing in the tubing and clogging it and the pump up.

Edit 2017-06-19: I’ve improved something…
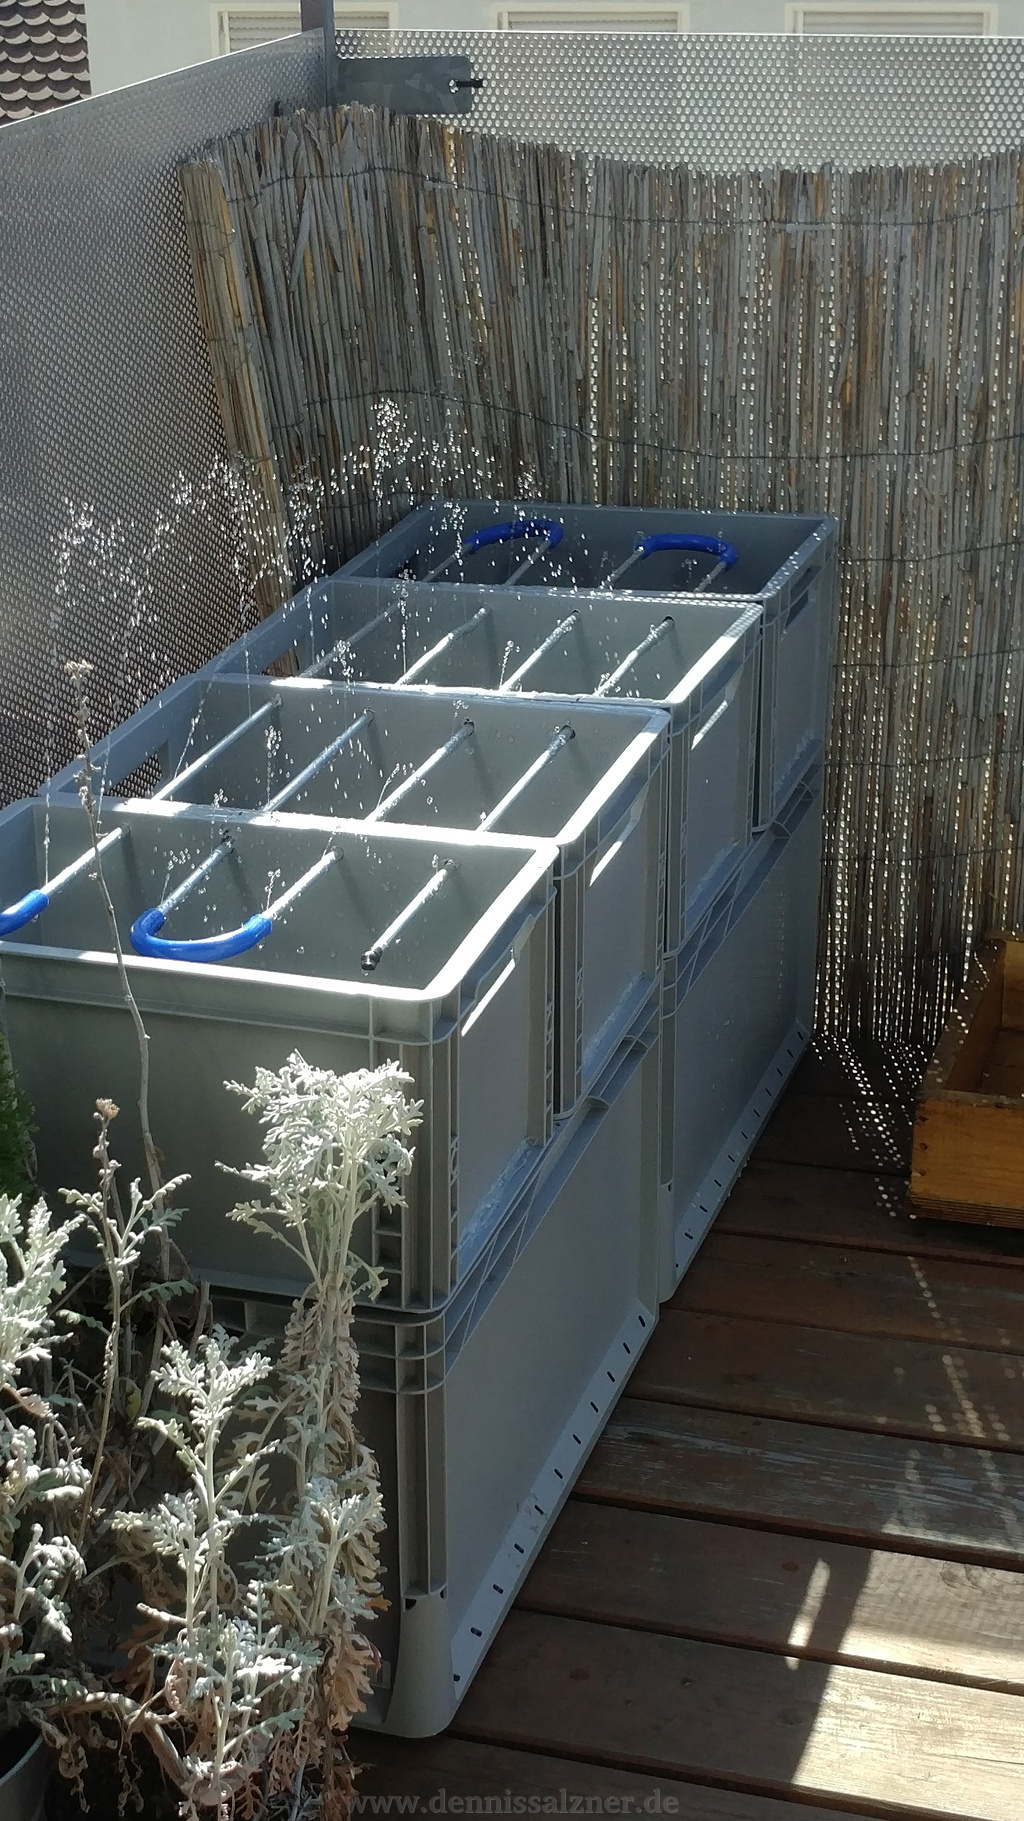
The clear tubing was at risk of clogging due to algae. The long tubing runs around corners were causing the water pressure to decline. The last growing bed wasn’t receiving as much water as the rest and the water wasn’t distributed evenly within the growing beds. An additional concern were birds that pick the seeds.
I found some aluminum rods and thicker dark blue non-transparent tubing.
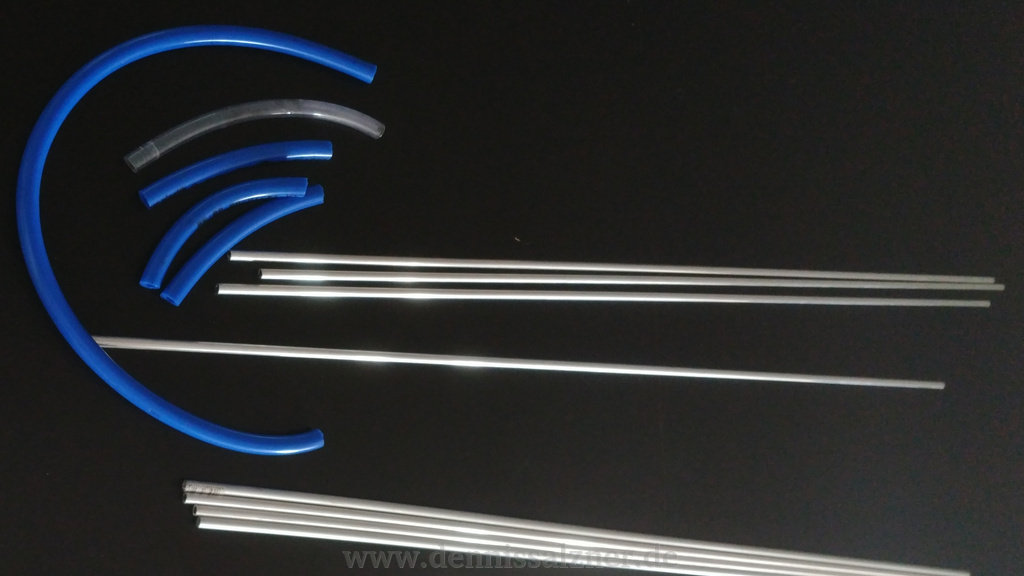
The tubing and rods were connected in a zig-zag pattern. The result is a much higher water pressure due to a shorter path the water has to travel. Small holes in the – non-flexibel, in contrast to the clear tubing used before – rods provide for a more even distribution of the water.
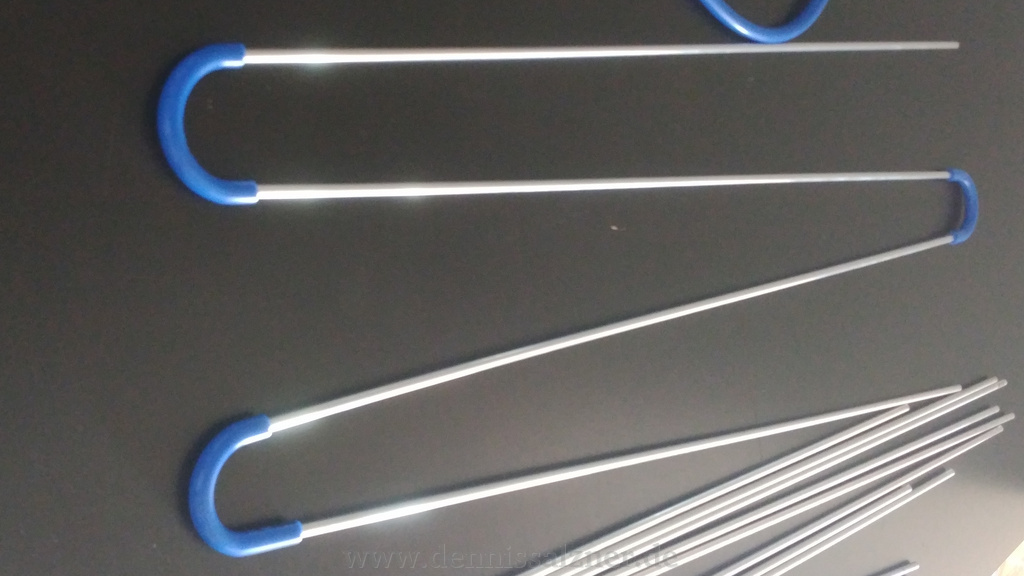
The rods are stuck in holes I’ve drilled along the top of the growing beds. This also adds additional stability against wind. Is is also easier to cover the growing beds with transparent foil if this should be necessary.
The blue tubing fits over the pump valve directly and simplifies the connection there.
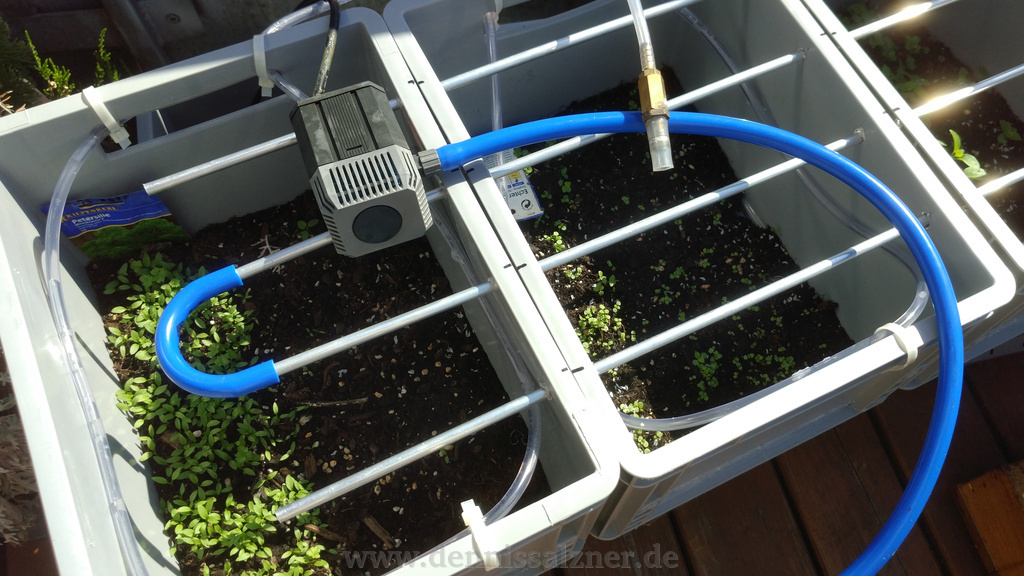
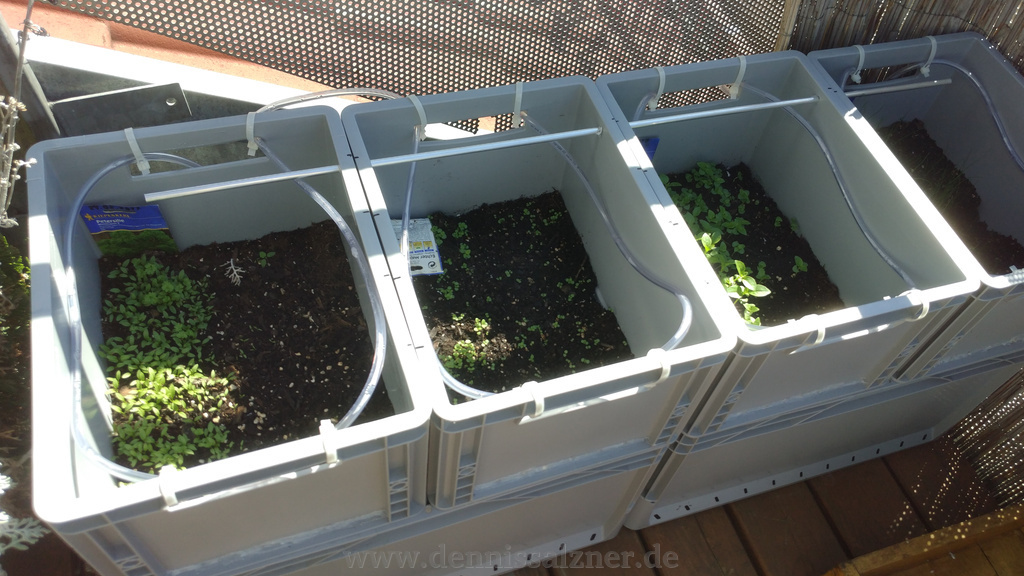
Connecting the pump in the new setup immediately yields an evenly distributed rain over the growing beds. This works much better than the previous concept.