
What
What we are trying to achieve
Last time around we built the cross-compiler. With it we can compile our own Kernel code in a way that is compatible to be booted on an x86 CPU. We then boot this custom kernel safely in QEmu, a hypervisor, that emulates a computer CPU.
What to expect
If all works well we will be able to boot our custom OS from a generated ISO CD-Image and see a message on the screen.

When
Stages during boot of an x86 computer
As seen in my previous post, after a computer boots it eventually loads the bootloader. We will be using GRUB, a very common bootloader for Linux OSes to load our bootcode that will then load oder Kernel written in C-Code.
Why
Required steps to build a custom Kernel
In order to achieve this we will use the cross-compiler from the previous part of the series to compile for i686-elf architectures. With it, we can:
- Compile the boot code written in assembly
- Compile the kernel C-Code
- Link the two together
- Create a bootable ISO CD-Image with Grub
- Boot that CD-Image in the QEmu Hypervisor
An important note regarding our Kernel C-Code: The code will be run in ring 1 or “Privileged Mode”. Grub itself runs mostly in Ring 0 or “Real Mode”. The difference is that some machine operations, most notable the famous “INT 13” BIOS-Interrupt for reading the disk, is not permitted in “Privileged Mode”.
Background
Sources of Code and Documentation
Much of code to initialize this bootloader is magic code that is specifically for the boot process of an x86-compatible computer.
A basic understanding of computers, as everyone will tell you, is beneficial. You can of course read the computer science literature. But there are also numerous sources of code Online. The osdev-Forums provide code examples in their barebones tutorial [1]. Searching for distinct keywords from that tutorial in GitHub yields numerous other Custom OSes that were based on the same barebones tutorial, als the boot code here.
As always in software development the question is merely at what stage do you move from your code to other people’s code. It’s important to keep in mind that the CPU itself has software running within it. The bootcode is the way it is, because it need to be compatible with the original Intel-Processors. Every major CPU since is made to be backward compatible. And we are also writing our boot code to be compatible with it.
At the same time the boot code is required to be compatible with the Multiboot-Specificaiton [2]. Otherwise the Grub-Bootloader would not be able to execute the code.
Much of the code in OS development is not written by a single person, but passed on and it is very specific to the target architecture. Be sure to check the references below.
How
Setting up the Boot-Code
In the following we will get to know the minimum required files (linker.ld, boot.asm, kernel.cpp and grub.cfg) that are required to get a PC to boot and print text on the screen.
The linker.ld is configuration file for gcc’s linker that is required to create a bootable kernel image:
linker.ld
ENTRY(_start)

SECTIONS
{
	/* 1 MB sections */
	. = 1M;

	/* Multiboot Header */
	.text BLOCK(4K) : ALIGN(4K)
	{
		*(.multiboot)
		*(.text)
	}

	/* Read-only data. */
	.rodata BLOCK(4K) : ALIGN(4K)
	{
		*(.rodata)
	}

	/* Read-write data (initialized) */
	.data BLOCK(4K) : ALIGN(4K)
	{
		*(.data)
	}

	/* Read-write data (uninitialized) and stack */
	.bss BLOCK(4K) : ALIGN(4K)
	{
		*(COMMON)
		*(.bss)
	}
}
The boot assembly code, boot.asm is what will call our “kernel_main” C-Code function for the kernel.
boot.asm
MBALIGN  equ  1 << 0
MEMINFO  equ  1 << 1
FLAGS    equ  MBALIGN | MEMINFO
MAGIC    equ  0x1BADB002
CHECKSUM equ -(MAGIC + FLAGS)

section .multiboot
align 4
	dd MAGIC
	dd FLAGS
	dd CHECKSUM

section .bss
align 16
stack_bottom:
resb 16384 ; 16 KiB
stack_top:

section .text
global _start:function (_start.end - _start)
_start:
	mov esp, stack_top
	extern kernel_main
	call kernel_main
	cli
.hang:	hlt
	jmp .hang
.end:
Setting the Grub-Bootloader
For booting our Custom OS we use the Grub-Bootloader. For this a small configuration for the Grub-Boot-Menu, grub.cfg, is provided:
grub.cfg
menuentry "myos" {
  multiboot /boot/myos.bin
}
Finally our Kernel-Code
And the first kernel.cpp is where things get interesting for us. For now it contains the code to print a simple “Hello World” onto the screen. This code is taken straight from the BareBones Tutorial [1].
It contains the code for writting on the screen. This is achieved by writing to a specific memory location, the Terminal Buffer at address 0xB8000.
kernel.cpp
#include <stdbool.h>
#include <stddef.h>
#include <stdint.h>

// === Terminal Code for writting on the screen ===
enum vga_color {
	VGA_COLOR_BLACK = 0,
	VGA_COLOR_BLUE = 1,
	VGA_COLOR_GREEN = 2,
	VGA_COLOR_CYAN = 3,
	VGA_COLOR_RED = 4,
	VGA_COLOR_MAGENTA = 5,
	VGA_COLOR_BROWN = 6,
	VGA_COLOR_LIGHT_GREY = 7,
	VGA_COLOR_DARK_GREY = 8,
	VGA_COLOR_LIGHT_BLUE = 9,
	VGA_COLOR_LIGHT_GREEN = 10,
	VGA_COLOR_LIGHT_CYAN = 11,
	VGA_COLOR_LIGHT_RED = 12,
	VGA_COLOR_LIGHT_MAGENTA = 13,
	VGA_COLOR_LIGHT_BROWN = 14,
	VGA_COLOR_WHITE = 15,
};

static inline uint8_t vga_entry_color(enum vga_color fg, enum vga_color bg) {
  return fg | bg << 4;
}

static inline uint16_t vga_entry(unsigned char uc, uint8_t color) {
  return (uint16_t) uc | (uint16_t) color << 8;
}

size_t strlen(const char* str) {
  size_t len = 0;
  while (str[len])
    len++;
  return len;
}

static const size_t VGA_WIDTH = 80;
static const size_t VGA_HEIGHT = 25;

size_t terminal_row;
size_t terminal_column;
uint8_t terminal_color;
uint16_t* terminal_buffer;

void terminal_initialize(void) {
  terminal_row = 0;
  terminal_column = 0;
  terminal_color = vga_entry_color(VGA_COLOR_LIGHT_GREY, VGA_COLOR_BLACK);
  terminal_buffer = (uint16_t*) 0xB8000; // terminal buffer memory location
  for (size_t y = 0; y < VGA_HEIGHT; y++) {
    for (size_t x = 0; x < VGA_WIDTH; x++) {
      const size_t index = y * VGA_WIDTH + x;
      terminal_buffer[index] = vga_entry(' ', terminal_color);
    }
  }
}

void terminal_setcolor(uint8_t color) {
  terminal_color = color;
}

void terminal_putentryat(char c, uint8_t color, size_t x, size_t y) {
  const size_t index = y * VGA_WIDTH + x;
  terminal_buffer[index] = vga_entry(c, color);
}

void terminal_putchar(char c) {
  terminal_putentryat(c, terminal_color, terminal_column, terminal_row);
  if (++terminal_column == VGA_WIDTH) {
    terminal_column = 0;
    if (++terminal_row == VGA_HEIGHT)
      terminal_row = 0;
  }
}

void terminal_write(const char* data, size_t size) {
  for (size_t i = 0; i < size; i++)
    terminal_putchar(data[i]);
}

void terminal_writestring(const char* data) {
  terminal_write(data, strlen(data));
}

extern "C" {
  void kernel_main(void) {
    terminal_initialize();
    terminal_writestring("Hello, kernel World!");
  }
}
...and a script for compiling
In order to build our kernel image, create a bootable ISO-CD-Image with Grub and to test boot the contraption in QEmu, I’ve built a custom Bash-Script. As your code grows it might make sense to translate this into a Makefile or even move to CMake.
build-and-boot.sh
#!/bin/bash
set -e
BASEDIR=$(cd `dirname $0` && pwd)
CC=${BASEDIR}/out/path/bin/i686-elf-g++ # path to our cross-compiler build from my last blog post
AS=${BASEDIR}/out/path/bin/i686-elf-as

echo "[ ] Install dependencies"
sudo apt -y install nasm xorriso qemu-system-i386

mkdir -p ${BASEDIR}/build
cd ${BASEDIR}/build

echo "[ ] Build boot code"
${AS} -felf32 ../boot.asm -o boot.o

echo "[ ] Compile Kernel"
${CC} -c ../kernel.cpp -o kernel.o -ffreestanding -O2 -Wall -Wextra -fno-exceptions -fno-rtti

echo "[ ] Link"
${CC} -T ../linker.ld -o myos.bin -ffreestanding -O2 -nostdlib boot.o kernel.o -lgcc

echo "[ ] Check is x86"
grub-file --is-x86-multiboot myos.bin
if [ $? -eq 0 ]; then
    echo "[ ] Output is x86 bootable"
else
    echo "[W] Output is not x86 bootable"
fi

echo "[ ] Creating bootable CD-Image with Grub-Bootloader"
mkdir -p isodir/boot/grub
cp myos.bin isodir/boot/myos.bin
cp ../grub.cfg isodir/boot/grub/grub.cfg
grub-mkrescue -o myos.iso isodir

echo "[ ] Booting in QEmu"
qemu-system-i386 -cdrom myos.iso
After running the script the code will be compiled, linked. Grub will generate a bootable ISO and this ISO is then booted with QEmu.
Progress
Result
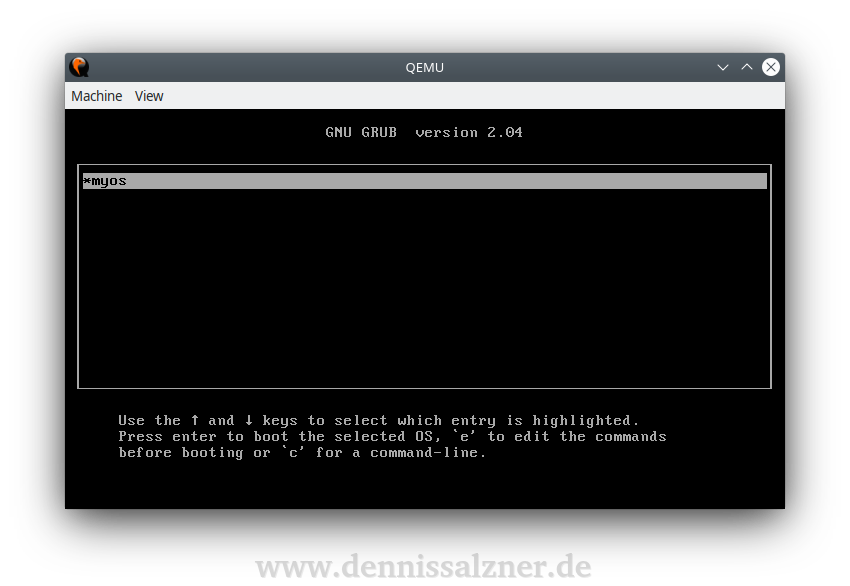
You should new be seeing QEmu with the message “Hello, kernel World!” from the above screenshot.
So far we’ve built a cross-compiler and have used it to compile example code for a kernel. We’ve created a bootable ISO-Image and booted it in QEmu to verify it works.
Our custom OS now has the ability to write text onto the screen. Next time we’ll add keyboard input in order to build a simple dialog system.
Annex: Syntax differences in Bootcode for different Assemblers
You might come across assembly boot code that looks differently. This is because there are numerous assemblers with a slightly different syntax. You could be using a Microsoft Assembler with Intel-Syntax, a Linux Assembler with AT&T-Syntax and it could be either in either the GCC assembler or NASM style. The code is mostly functionally identical.
| NASM (Netwide Assembler) | i686-elf-as (GNU Assembler or "GAS" in Intel Syntax) |
|
|
Pro-Tip: If you’ve got Assembler-Code in either NASM or GAS and you want to translate to the other, compile it with the repective assembler and then use objdump on the object file. This will output to NASM/Intel-Syntax:
objdump -M intel-mnemonic -d boot.o1] https://wiki.osdev.org/Bare_Bones 2] https://www.gnu.org/software/grub/manual/multiboot/multiboot.html