What
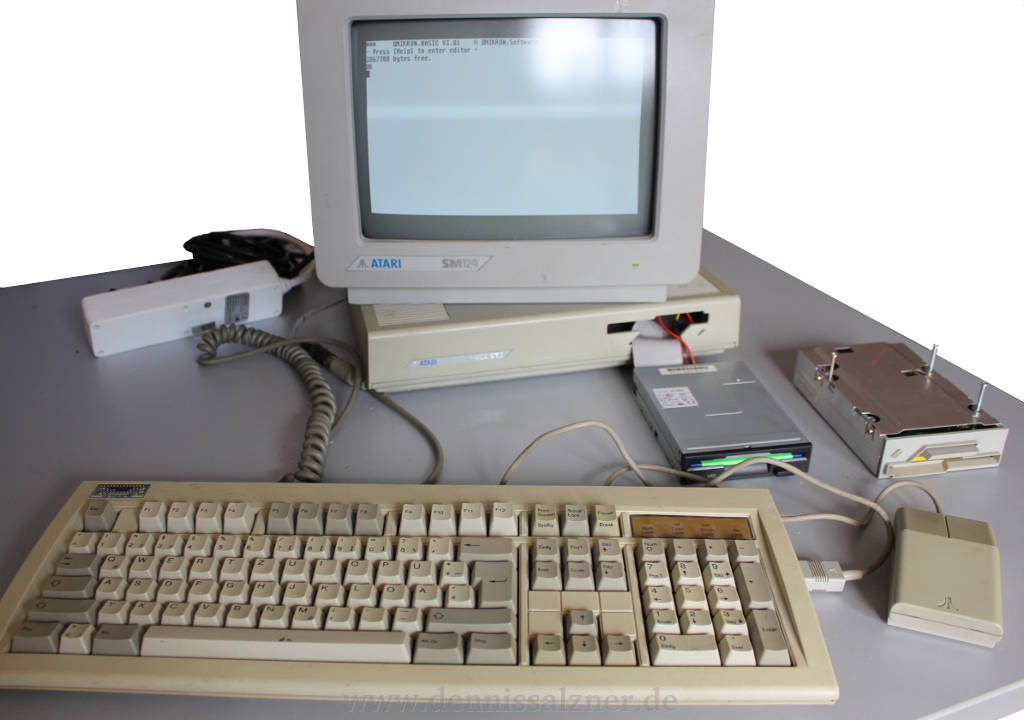
The Atari ST Mega home computer was produced from 1985 to 1994. It uses the Motorola 68k line of chips as its main processor with a 16 bit data bus. The Atari ST Mega that I have came with an Atari Megafile hard disk and Atari SM124 monochrome monitor. In the following I describe the modifications I have made to make the computer useable in the 21st century. I have taken great care to keep the machine unaltered and merely added adaptors and replaced components that can be reverted back, in order to preserve the computer for future years to come.
When
I have revisited this project from time to time. The Atari ST sat on my shelf for years, but ever so often I try some software, devlop something or program assembler code on it. To me it’s the perfect plattform to try out assembler, because the plattform is at a bare minimum in terms of complexity. I use the Mas-86k assembler, Omikron Basic or Turbo C to programm software for the Atari.
Background
The Atari ST is the first computer I learned programming on and it holds a sentimental value for me since. Running the computer today requires overcoming a few challenges. Most notably the hard drives are common to fail after such a long time. I also wouldn’t trust the monitor anymore and would not leave it running unsupervised.
How
Floppy Drive:
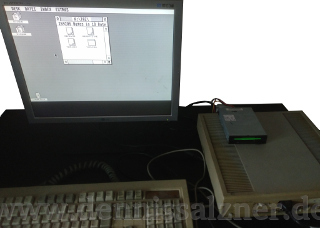
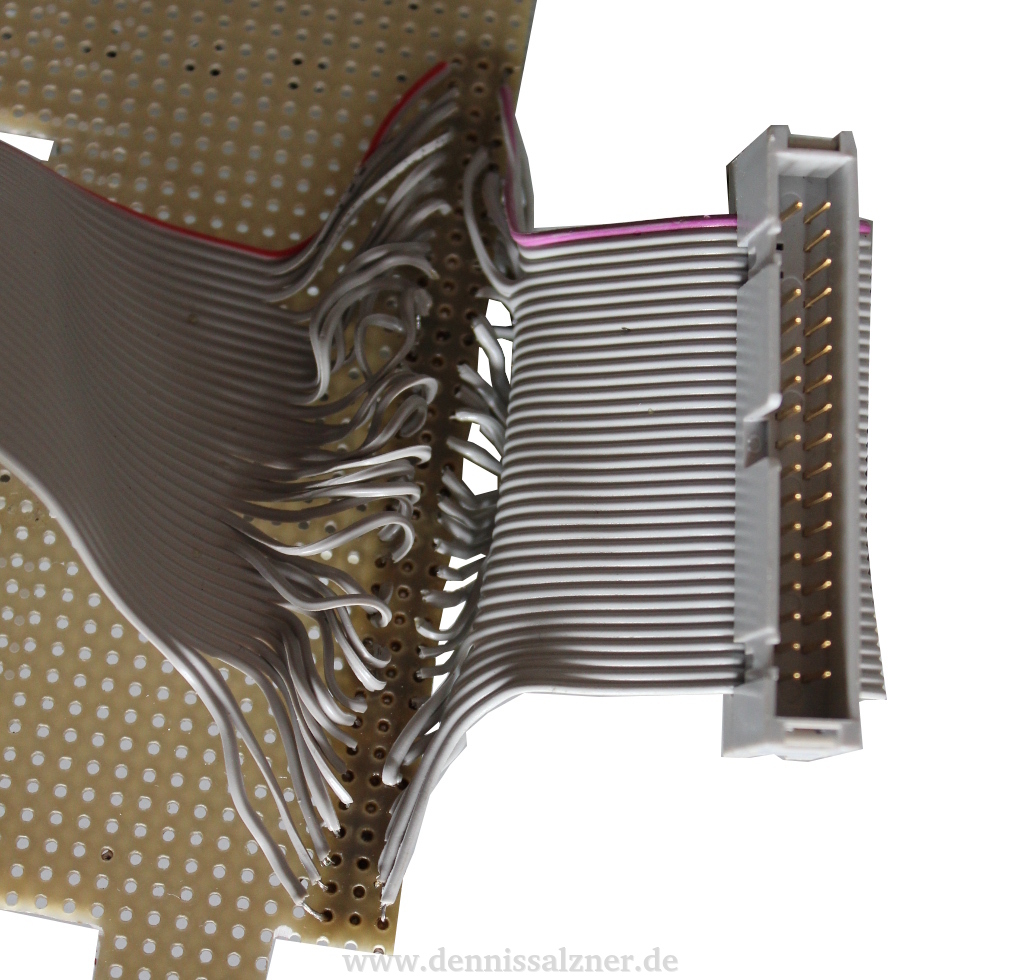
The first modification I made date back to 2013. The original floppy drive in the Atari ST did not function anymore. With the hard drive being defunct as well, there was no way to use the computer at all. I found a way to connect standard IDE floppy drives to the Atari. The procedure is fairly simple: It requires resoldering an old Floppy IDE cable. Floppy cables twist some of the inner wires. On IBM computers this selects whether the drive is to be recognized as A: or B:. For the Atari, we need to get rid of this twist and solder the wires straght. An old Windows computer with another IDE floppy was used to write floppy images found on the Internet. This way I was able to load and run software.
Serial Port:
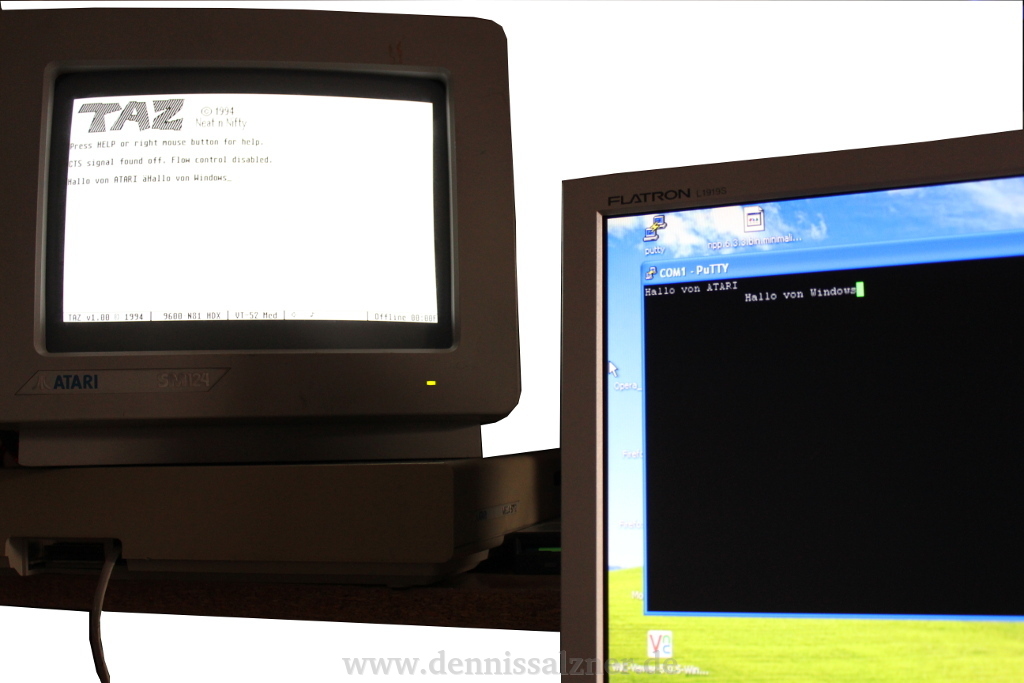
After that I built a small RS232 adapter for serial connections. This adapter converts the Atari ST’s DB25 Modem Connector to modern DB9 RS232 that can be connected to a modern computer either directly or via a USB-to-Serial Adapter. Atari software such as “TAZ” from 1994 can be used to send messages back and forth from the Atari and a serial communication sesson in Putty on the modern computer. By using TAZ on the Atari ST and minicom on Linux, files can be transfered via the serial connection.
Power Cord:
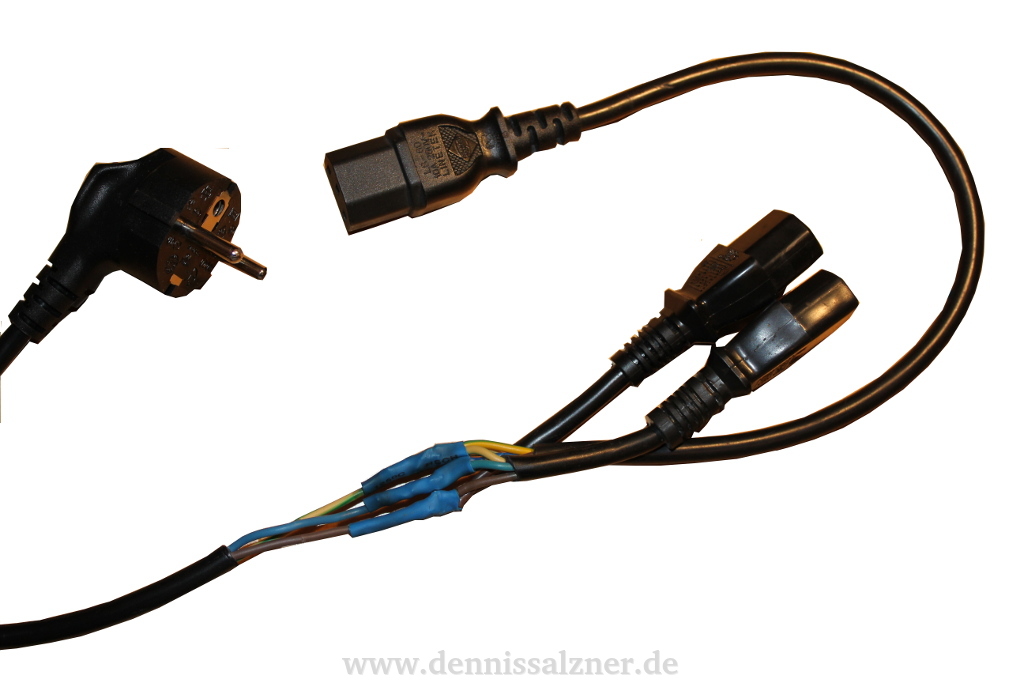
In 2014, after switching apartments, I was out of power cords. The Atari ST requires three for the main computer, the hard drive and the monitor. I built a custom plug that connects to one wall socket and provides three plugs for the Atari on the other end.
Hard Drive Plug:
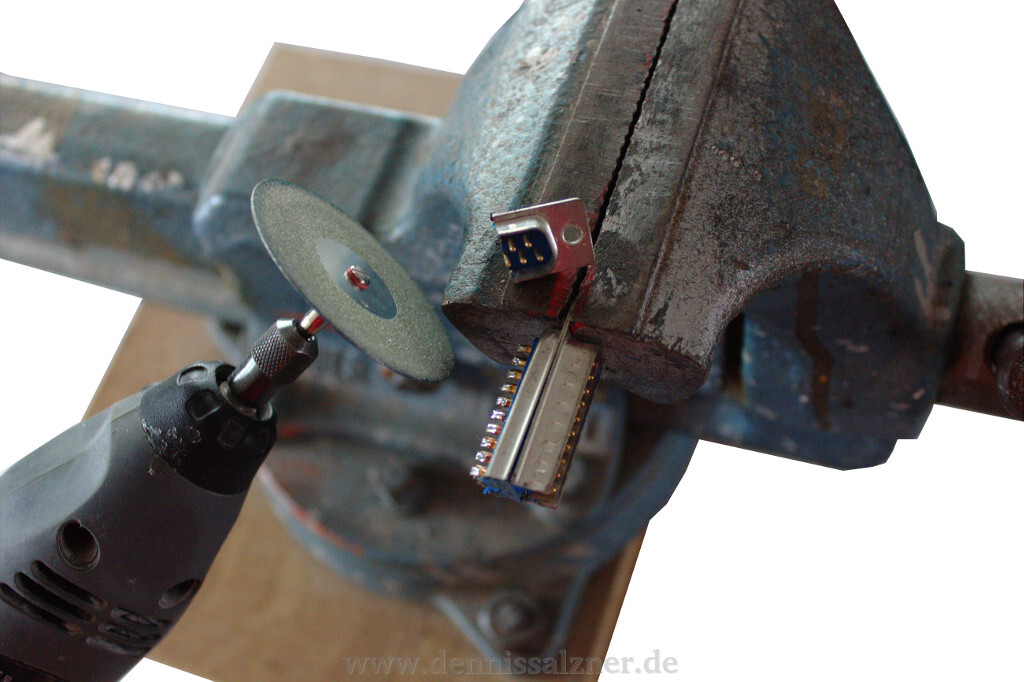
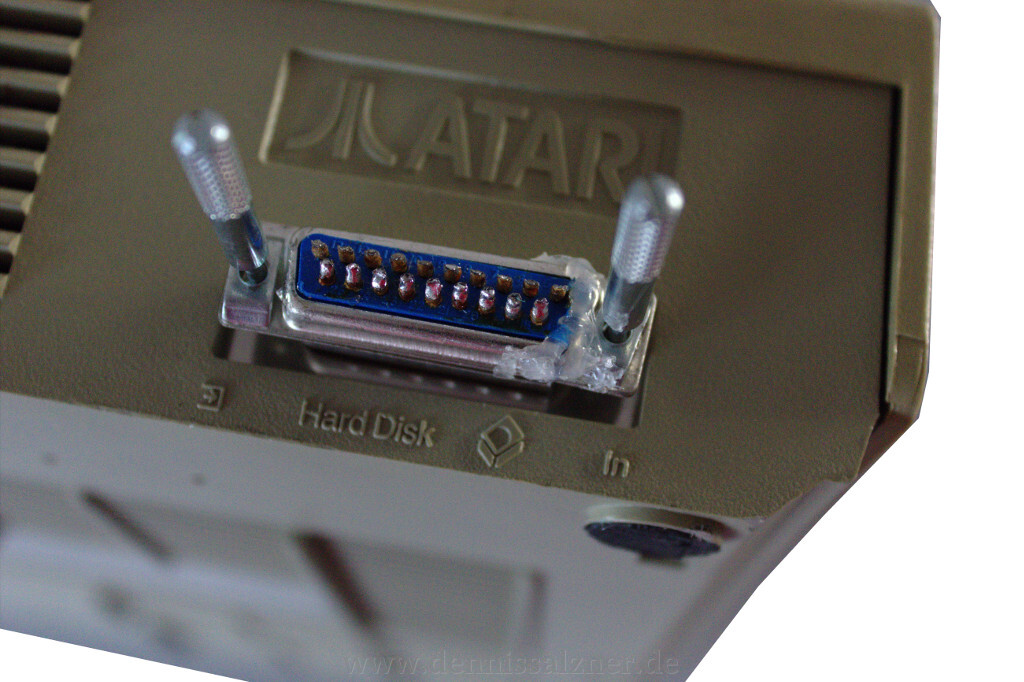
The defunct hard drive meant having to switch floppy disks for loading different desktop environments, software and accessing files. In 2016, I started reading about hard drive adapters. The Atari uses a fairly uncommon hard drive interface “ACSI”. It is similar to “SCSI”, but not compatible. SCSI drives can be connected via expensive adapters. Another solution are ACSI-to-IDE or SD-Card adapters. Apparantly also old Iomega ZIP and JAZ Drives can be connected via rare adapters. I didn’t find a compelling solution so far. I did however build a plug for the ACSI port. For this I cut out a segment from a standard DB25 plug and then glued together the two halves. Seeing that the prices for FPGAs have decresed quite a bit, I might try to design my own SD-Card to ACSI adapter. This has been done before using a CPLD to catch the timing in conjunction with a micro-controller for the protocol translation (see Jookie’s work).
Monitor Adapter:
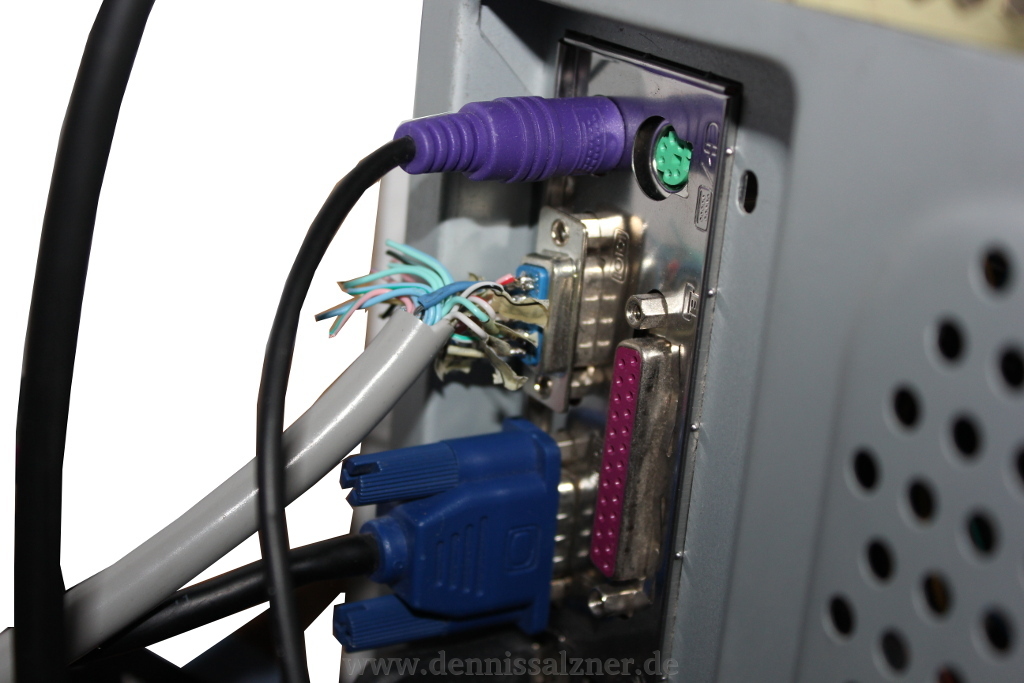
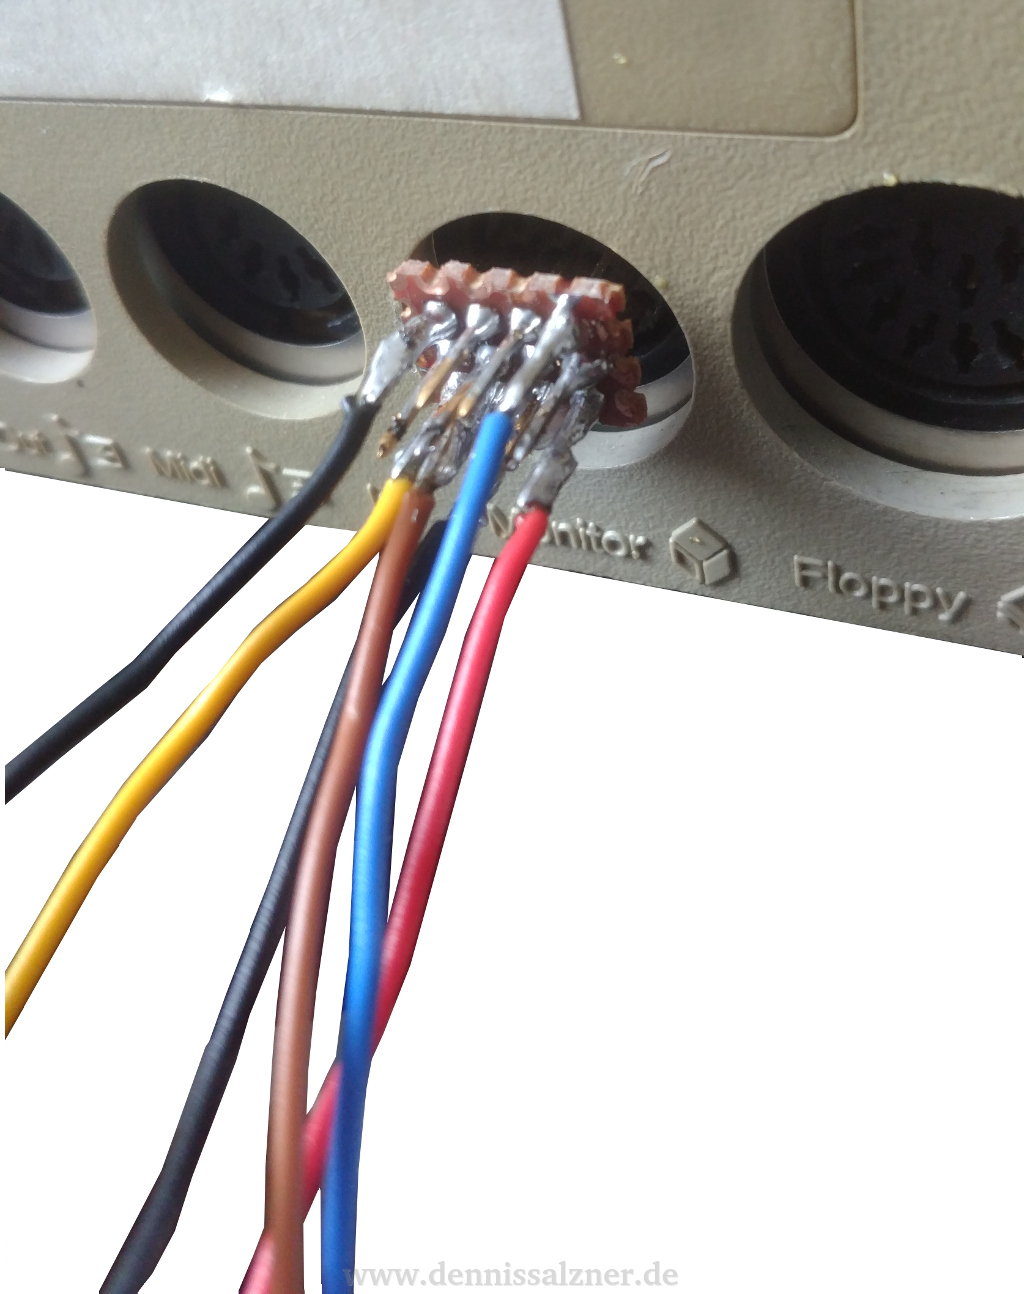
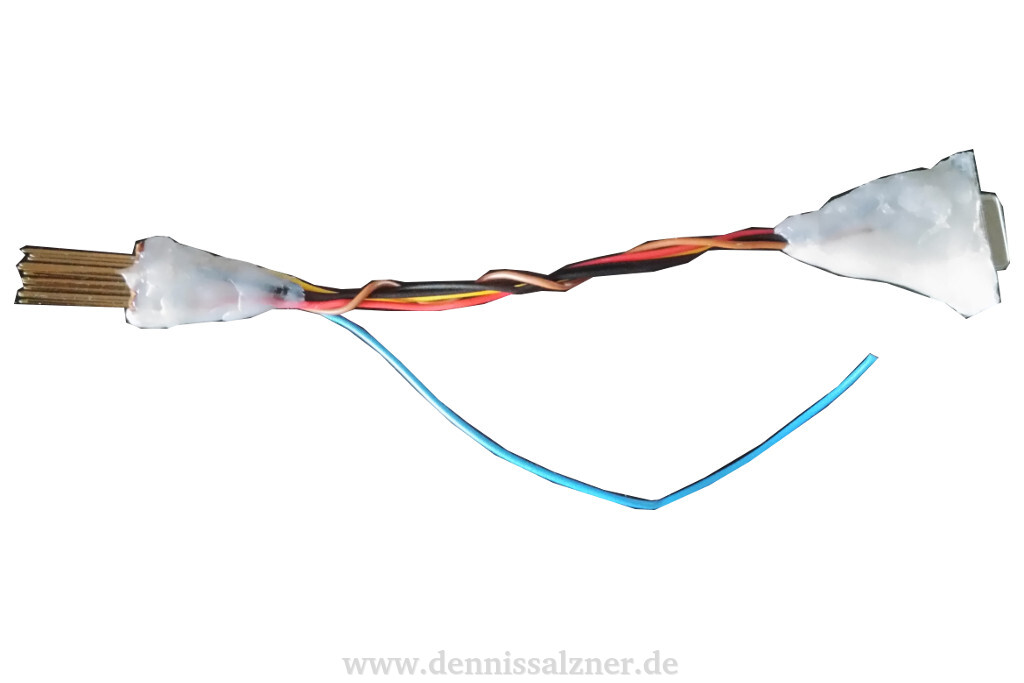
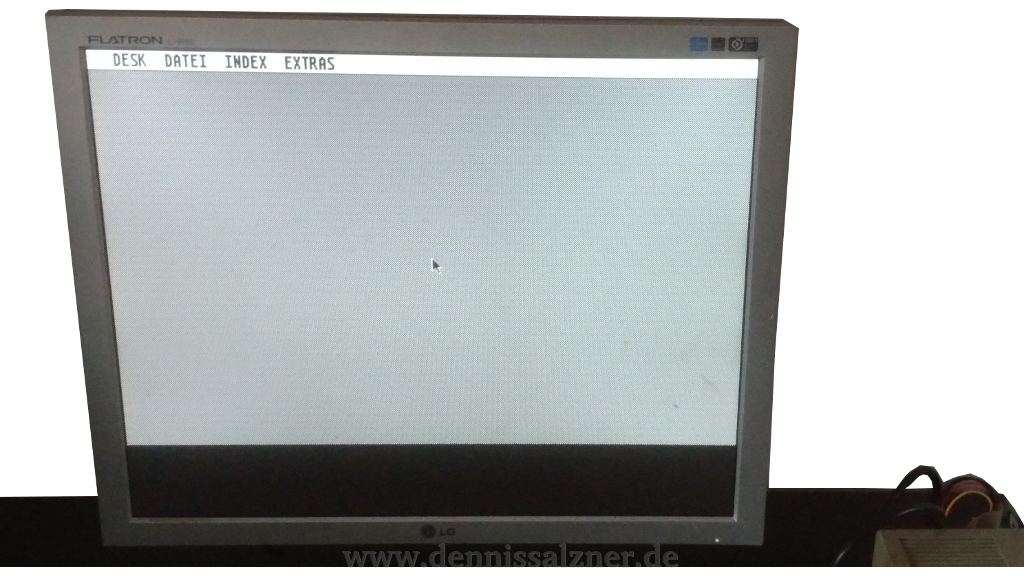
Also in 2016 I tried to build a VGA adapter. The Atari Monitor, SM124, I have works fine, but I’m not sure for how long and I’m concerened that such an old monitor may implode at some point. The first adapter I built didn’t work and I let it rest. In 2017 I succeeded using a different LCD Monitor and 75 Ohm Resistors for each the Red, Green and Blue VGA channels. This worked extremly well. In order to connect the adapter to the Atari ST a special plug was necessary. I took a shortcut here and put individual pins in the Atari’s Monitor port. I then soldered these pins to a perfboard. After soldering wires to that and adding the female VGA connector to the other end, the whole contraption was sealed with lots of hot glue. Hot glue can be molded when it’s cooled down, but not fully hardened yet. This was an easy solution for a fairly rigid adapter. The blue wire, together with the black Ground wire, can be used for audio, but I haven’t connected that yet.
Progress
Mouse and Keyboard:
What’s missing now are proper mouse and keyboard adapters. I’ve read a lot online and it seems to be a fairly easy to build such adapters. It does however require a microcontroller to actively translate the signals. The easiest approach is to use a PS/2 Keyboard and Mouse. There are many Arduino PS/2 software libraries. Most USB keyboards and mice have a fallback mode to PS/2. Otherwise adapters can be found online that translate USB to PS/2. Using PS/2 instead of USB makes the adapter a lot easier to build, because it doesn’t require a USB stack. From there the adapter needs to translate PS/2 to the Atari Mouse and Keyboard signals.
Floppy Drive Emulation:
Regarding the hard drive I’ve found a cheaper and easier solution than converting ACSI - for now. The Gotek Floppy Emulator is a drop-in replacement for IDE Floppy drives. It reads floppy images from a USB Stick. Two buttons allow switching to the next or previous image. This is transparent to the Atarias it sees a standard floppy disk drive from which the previous disk was removed and a new one was inserted.